A survey is a form people fill in on their own, at their own pace, without a live session. Use it for feedback after a training, event registration details or a course evaluation. A survey can stand alone or be linked to a presentation, so people can open it at the end of your session.
Create a survey
- 1
Open Survey
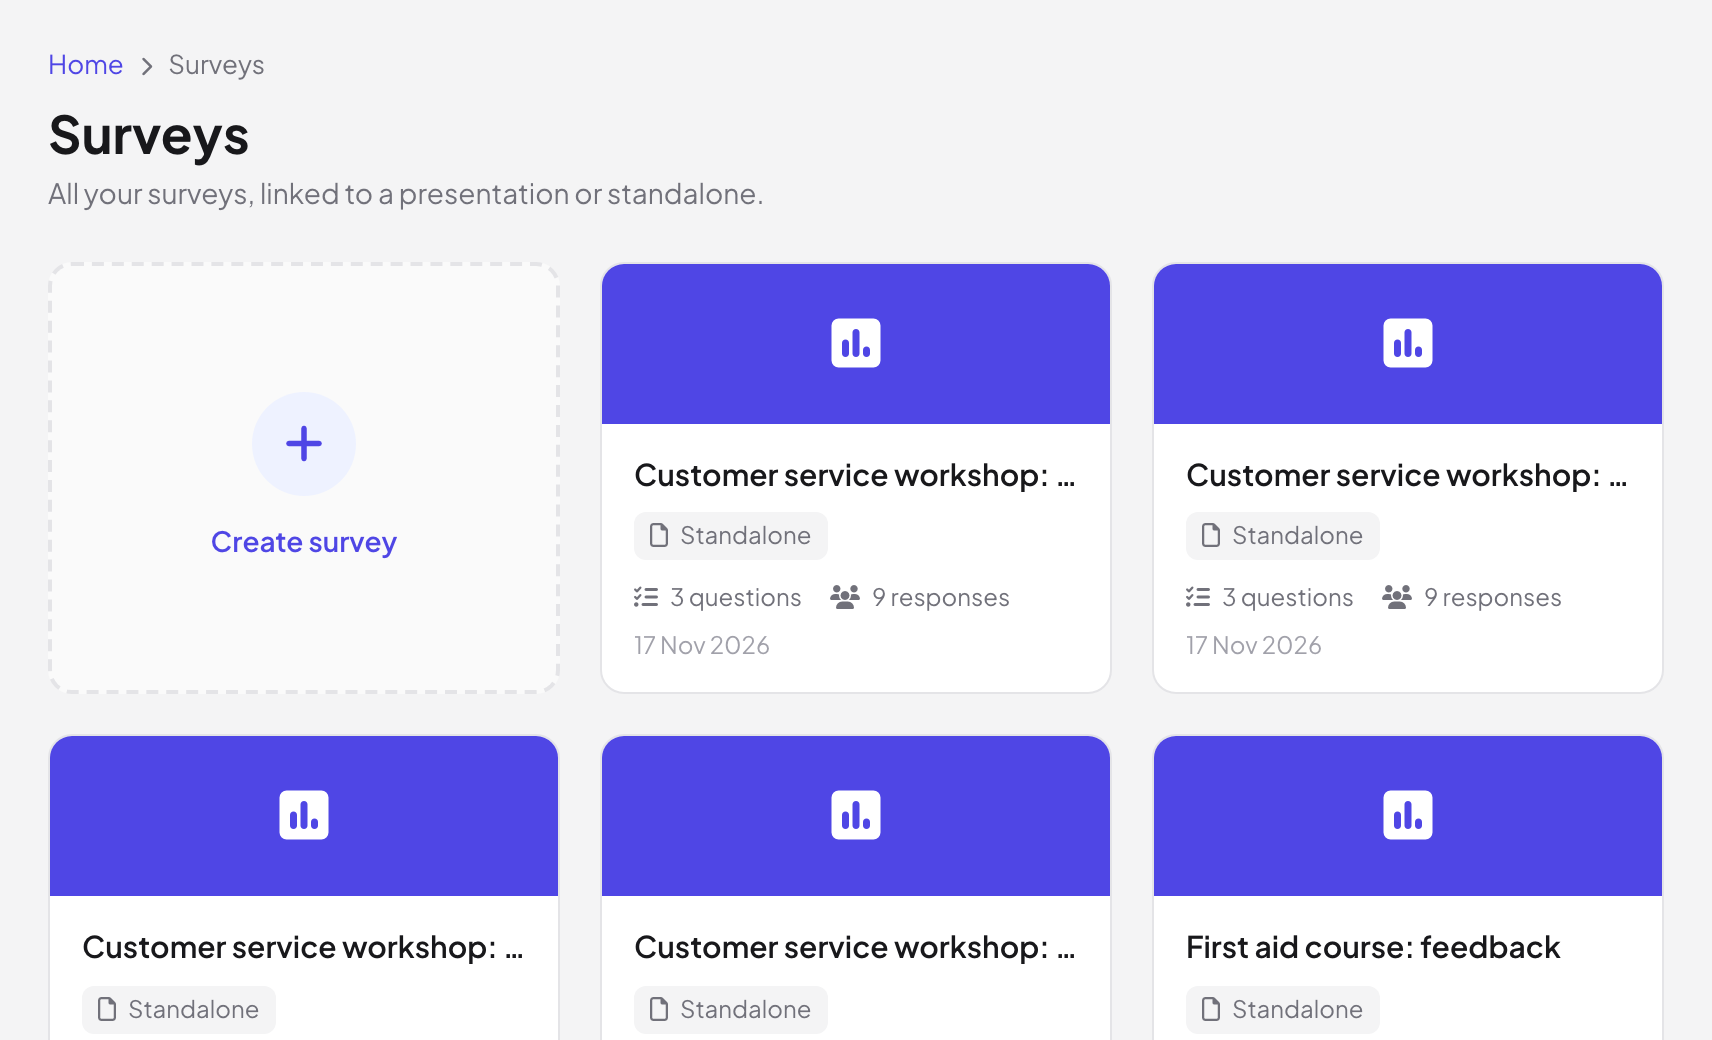
Click Survey in the menu on the left, then Create survey. Under Linked presentation (optional), pick a presentation or keep None (standalone). From inside a presentation you can also click the Survey icon in the top bar.
- 2
Add your questions
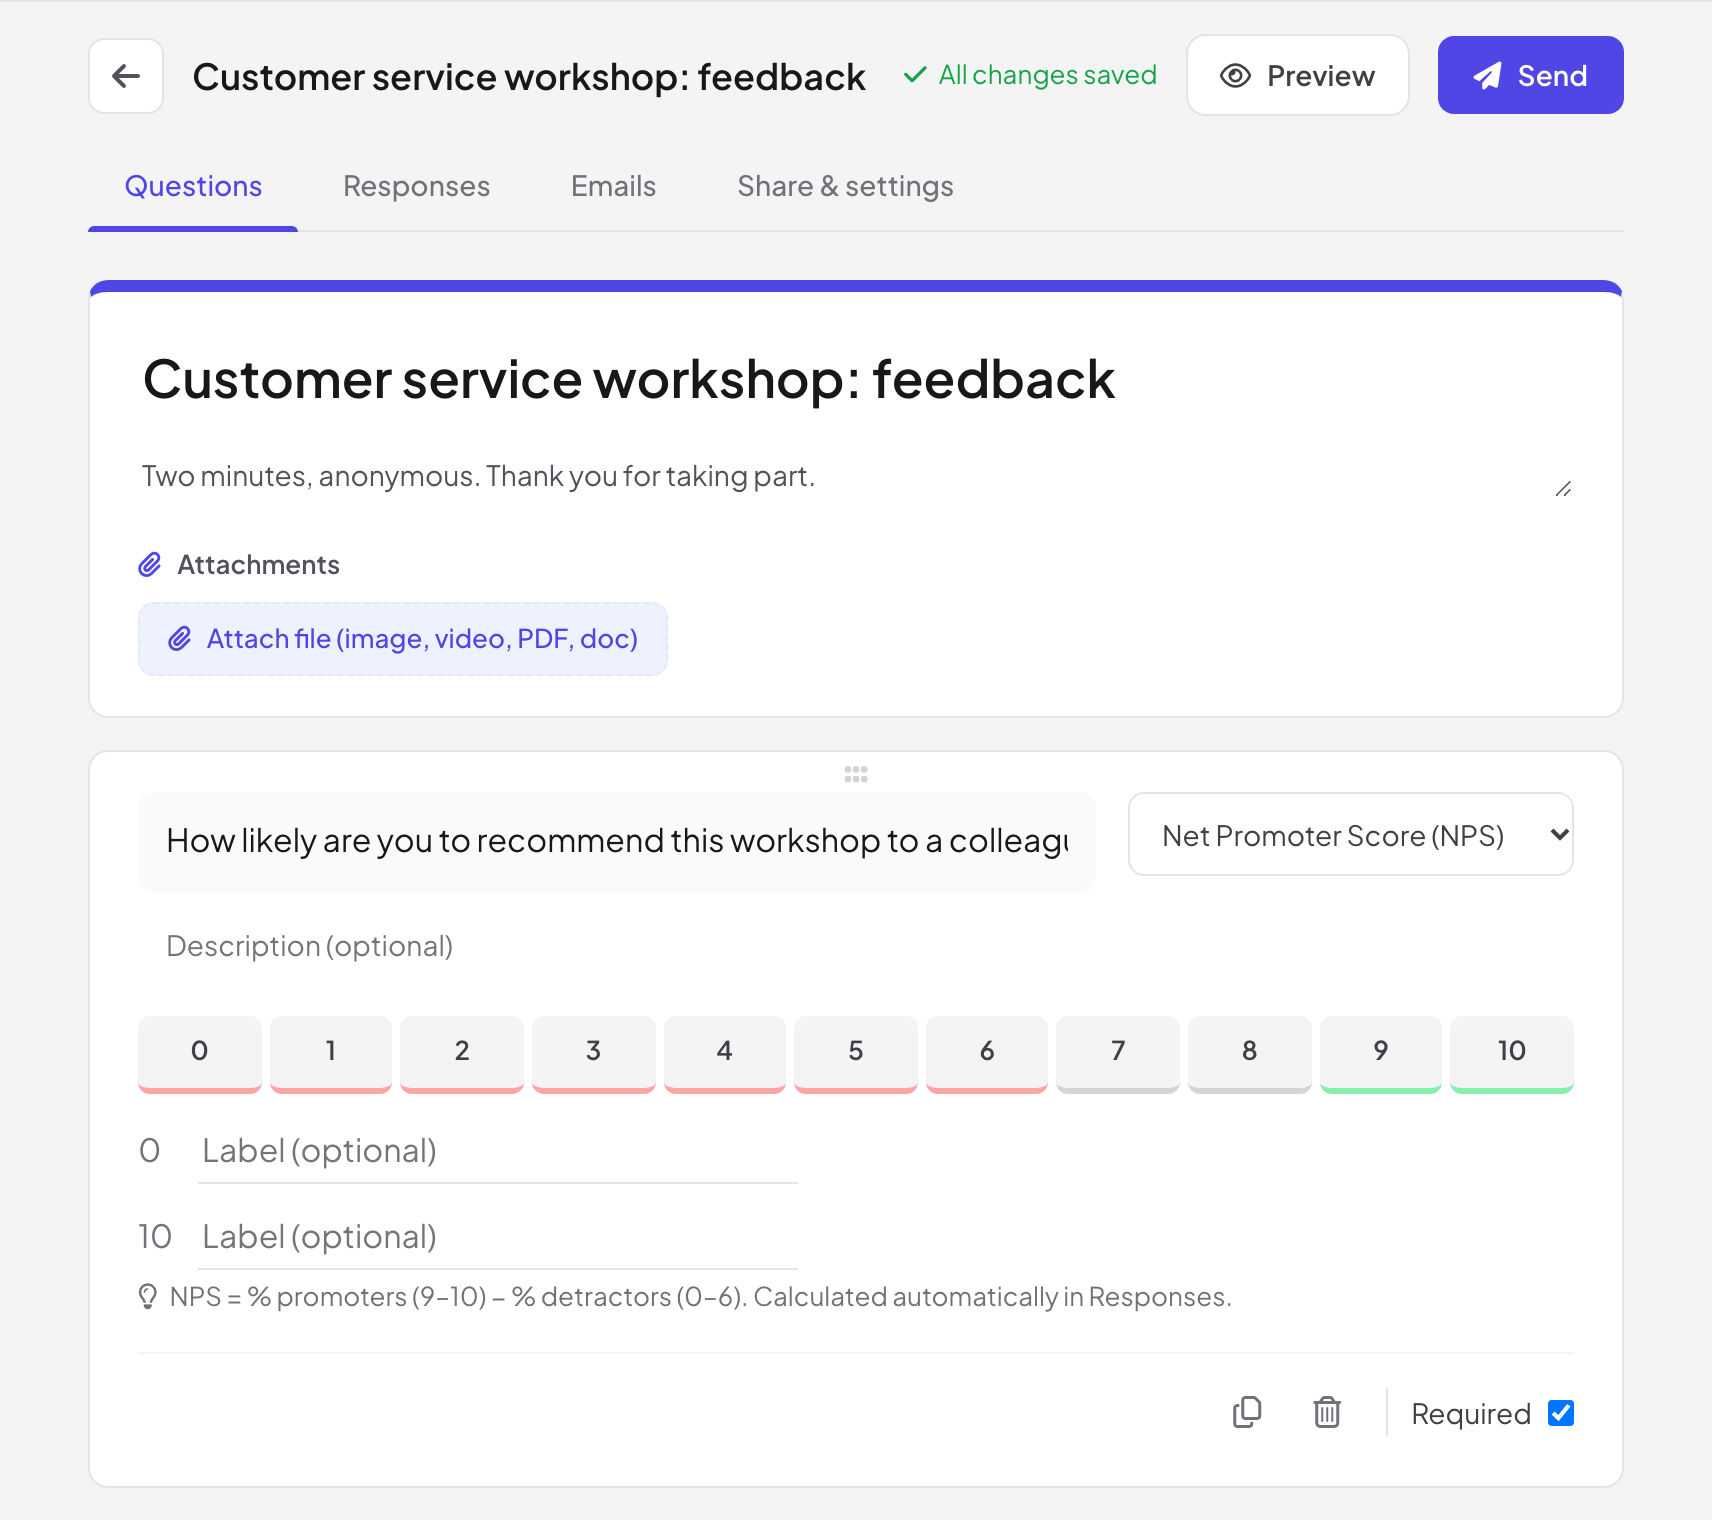
On the Questions tab, give the survey a title and a description, then click Add question. Pick the type in the menu at the top right of each question, and tick Required if people must answer it. Use Add section to split a long survey into pages.
- 3
Check it
Click Preview to fill in the survey as a respondent. Answers in preview are not saved. Changes save by themselves: the top bar says All changes saved.
- 4
Send it
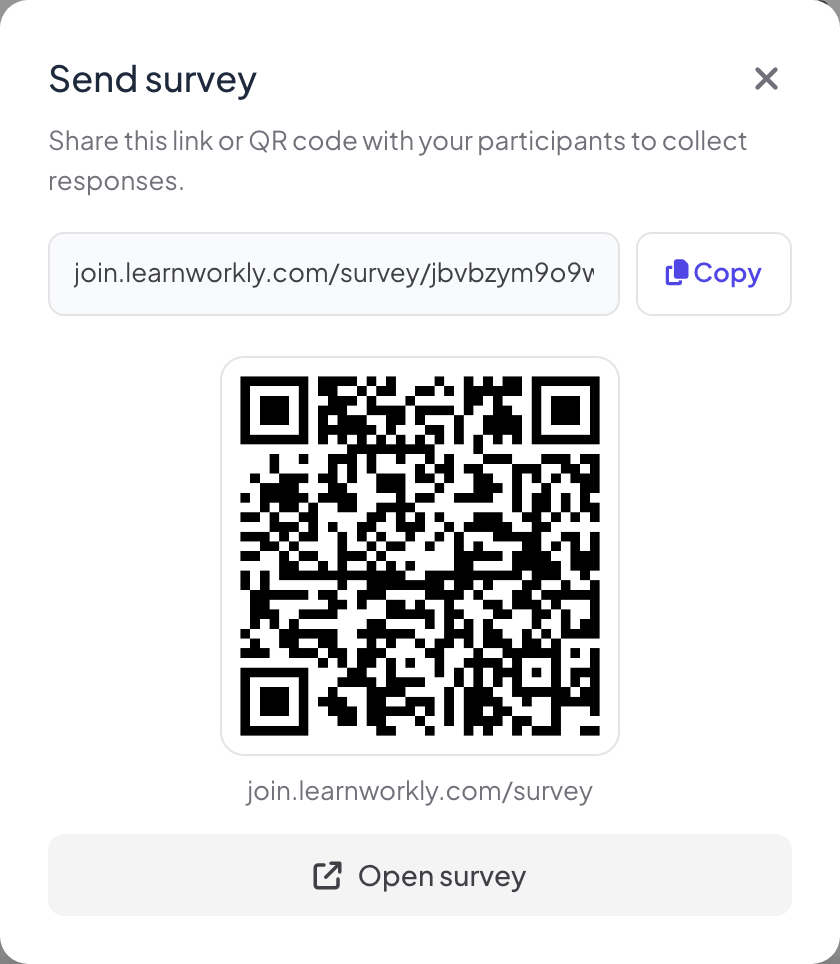
Click Send. Send survey shows the participant link with Copy, a QR code and Open survey. People open the link on any device; they do not need an account.
Question types
| Group | Types |
|---|---|
| Text | Short answer, Paragraph, Email, Number |
| Choice | Multiple choice, Checkboxes, Dropdown, Ranking |
| Scale | Rating, Net Promoter Score (NPS), Linear scale, Matrix / Grid |
| Other | File upload, Date, Time |
Sections and branching
With sections, you can send people to a different section depending on their answer: use Go to section based on answer on a choice question, or set After this section to continue, jump to another section or Submit form. Choice questions can also offer an Other option where people type their own answer, and checkboxes can have a Selection limit.
Share & settings
- 1
Open or close the survey
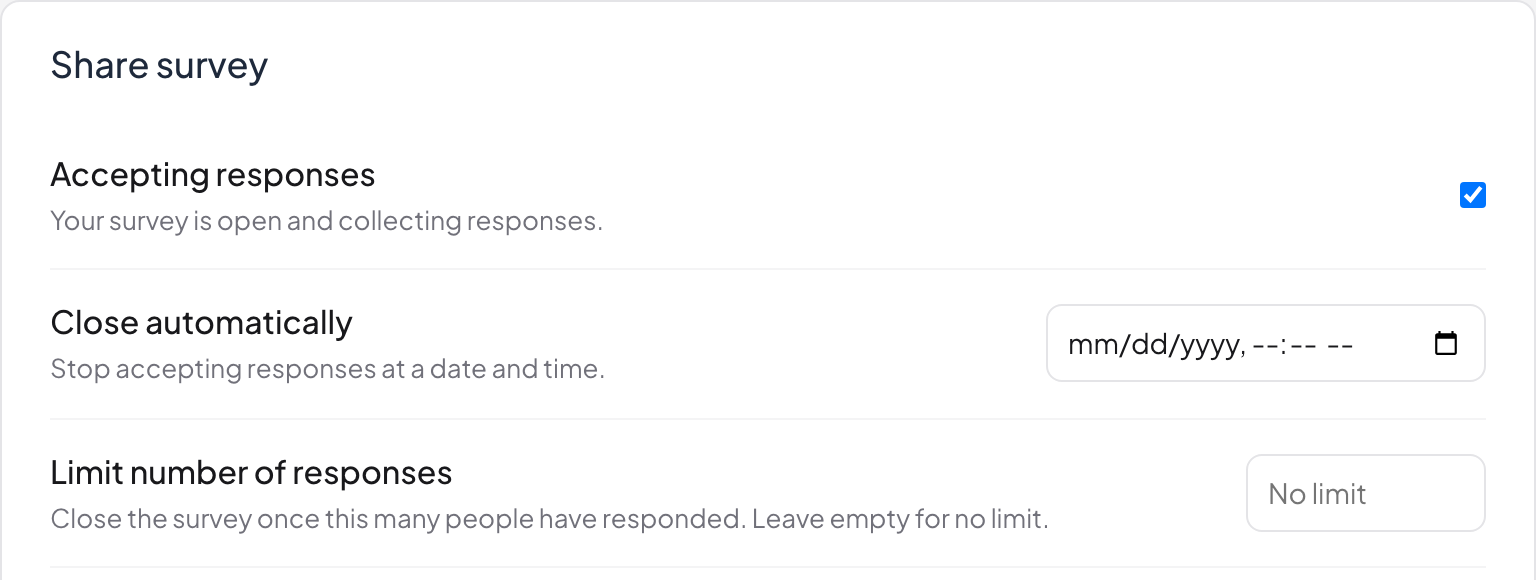
On the Share & settings tab, Accepting responses opens and closes the survey. Close automatically stops it at a date and time, and Limit number of responses closes it after that many responses (leave it empty for no limit). The participant link and QR code are below.
- 2
Choose how it looks and behaves
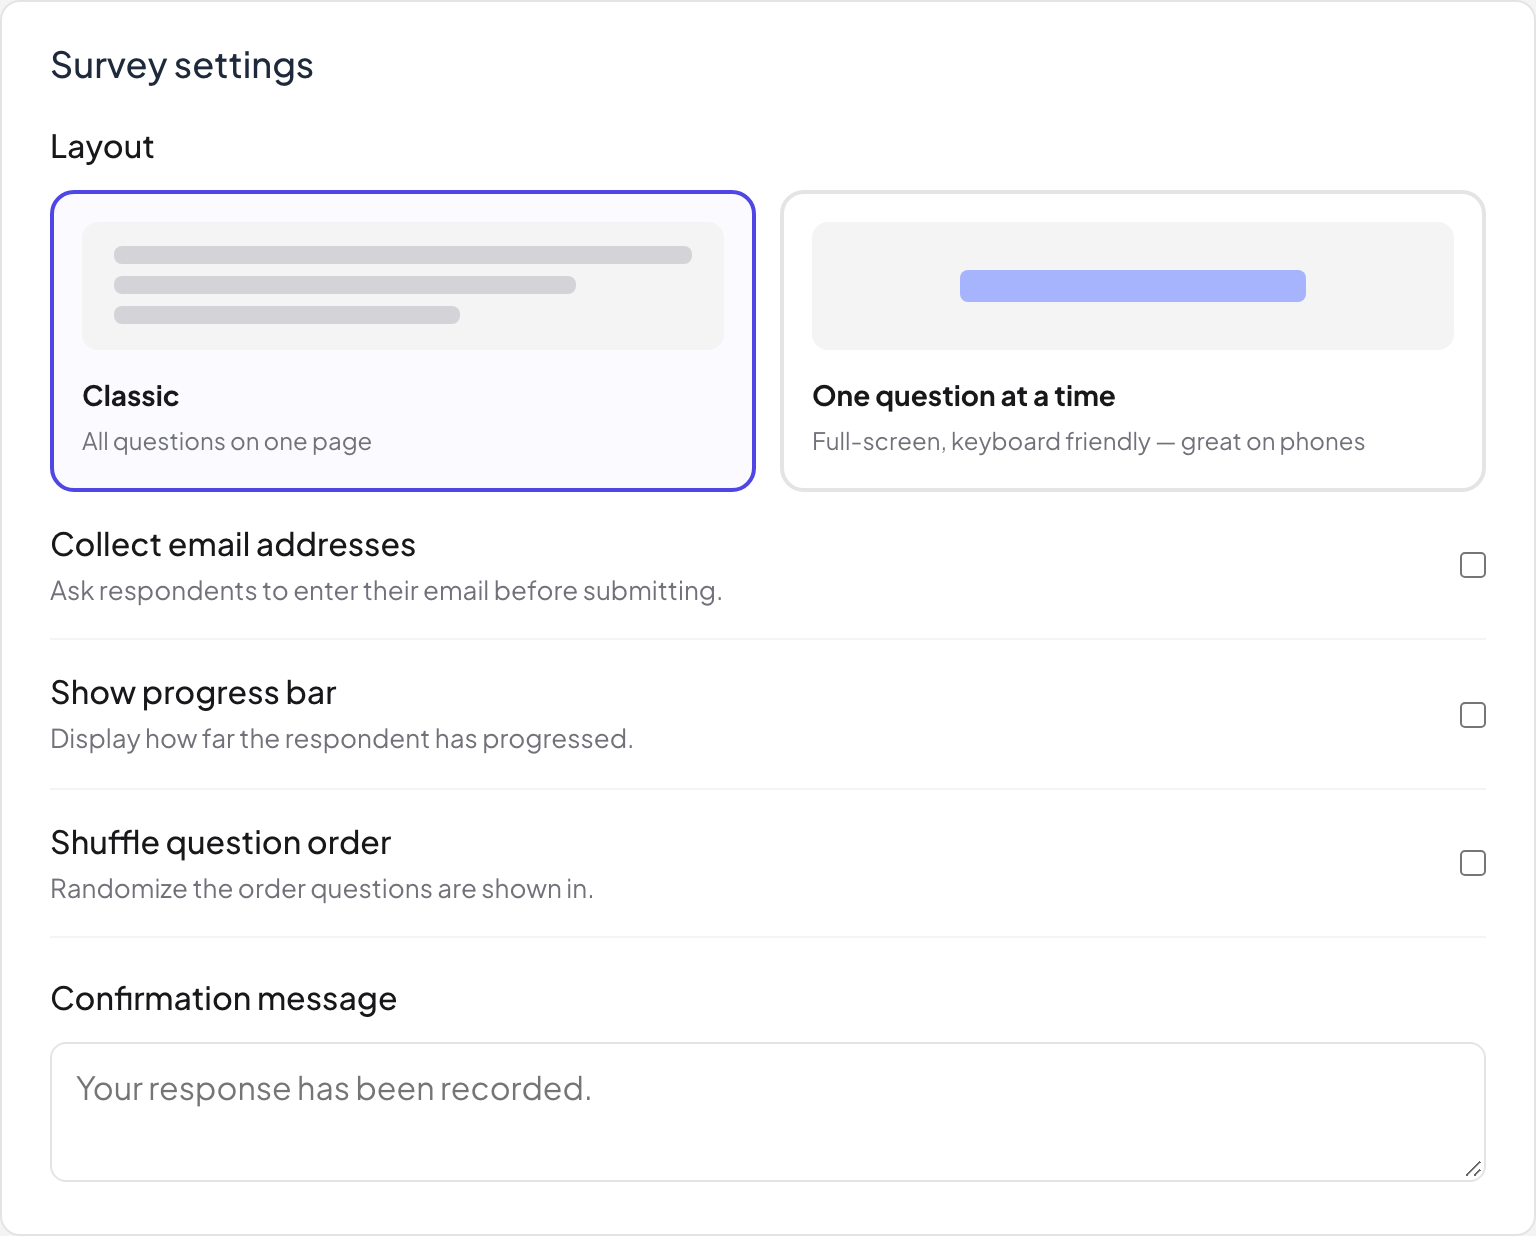
Under Survey settings, pick the Layout: Classic or One question at a time (full screen, keyboard friendly, great on phones). Then choose Collect email addresses, Show progress bar, Shuffle question order and the Confirmation message shown after people submit.
- 3
Match your brand
Under Theme, upload a Cover image, choose the Main color and the Font, or click Match presentation style for a linked survey. A linked survey also has Show on last slide of your presentation, which shows live participants a button to open it at the end.
What respondents see
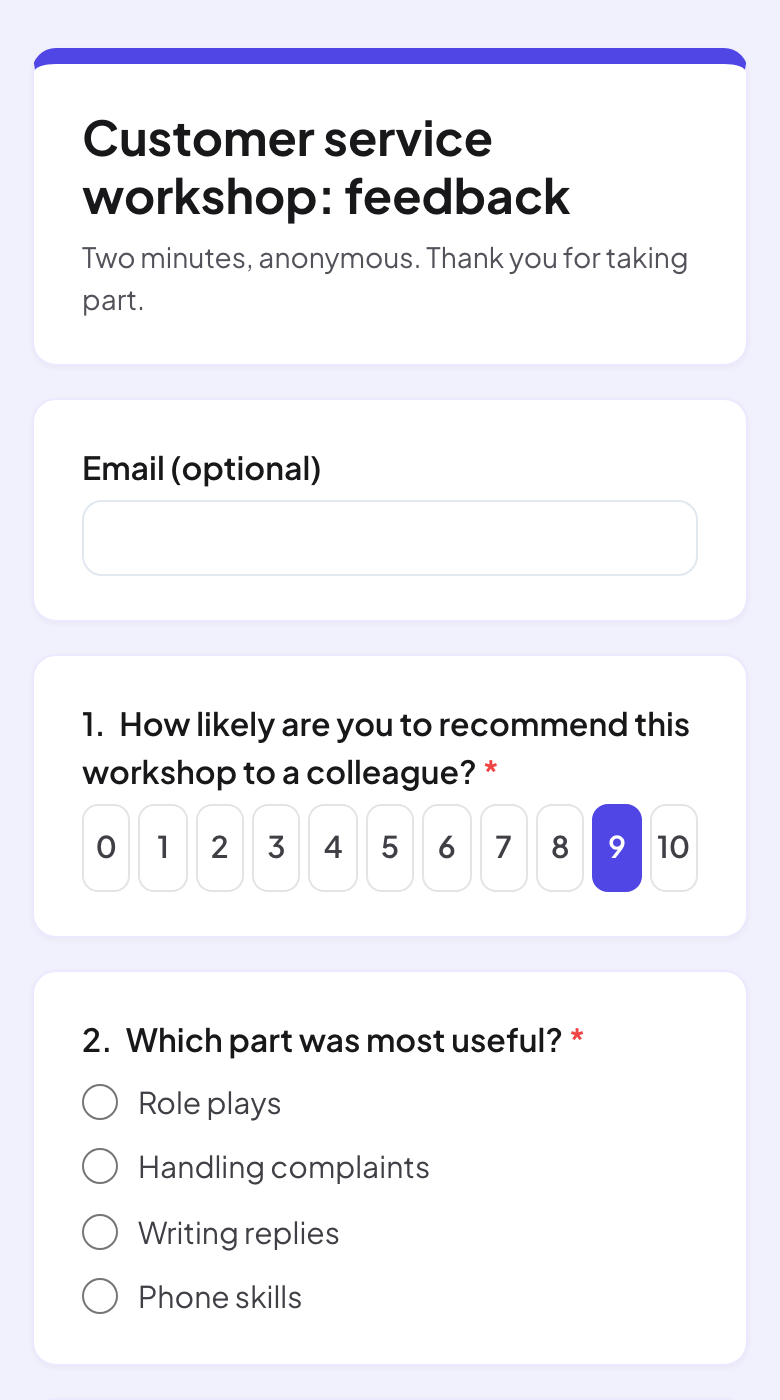
The survey opens with your title and description, then the questions. Required questions are marked with a red star.
Read the responses
- 1
Open Responses
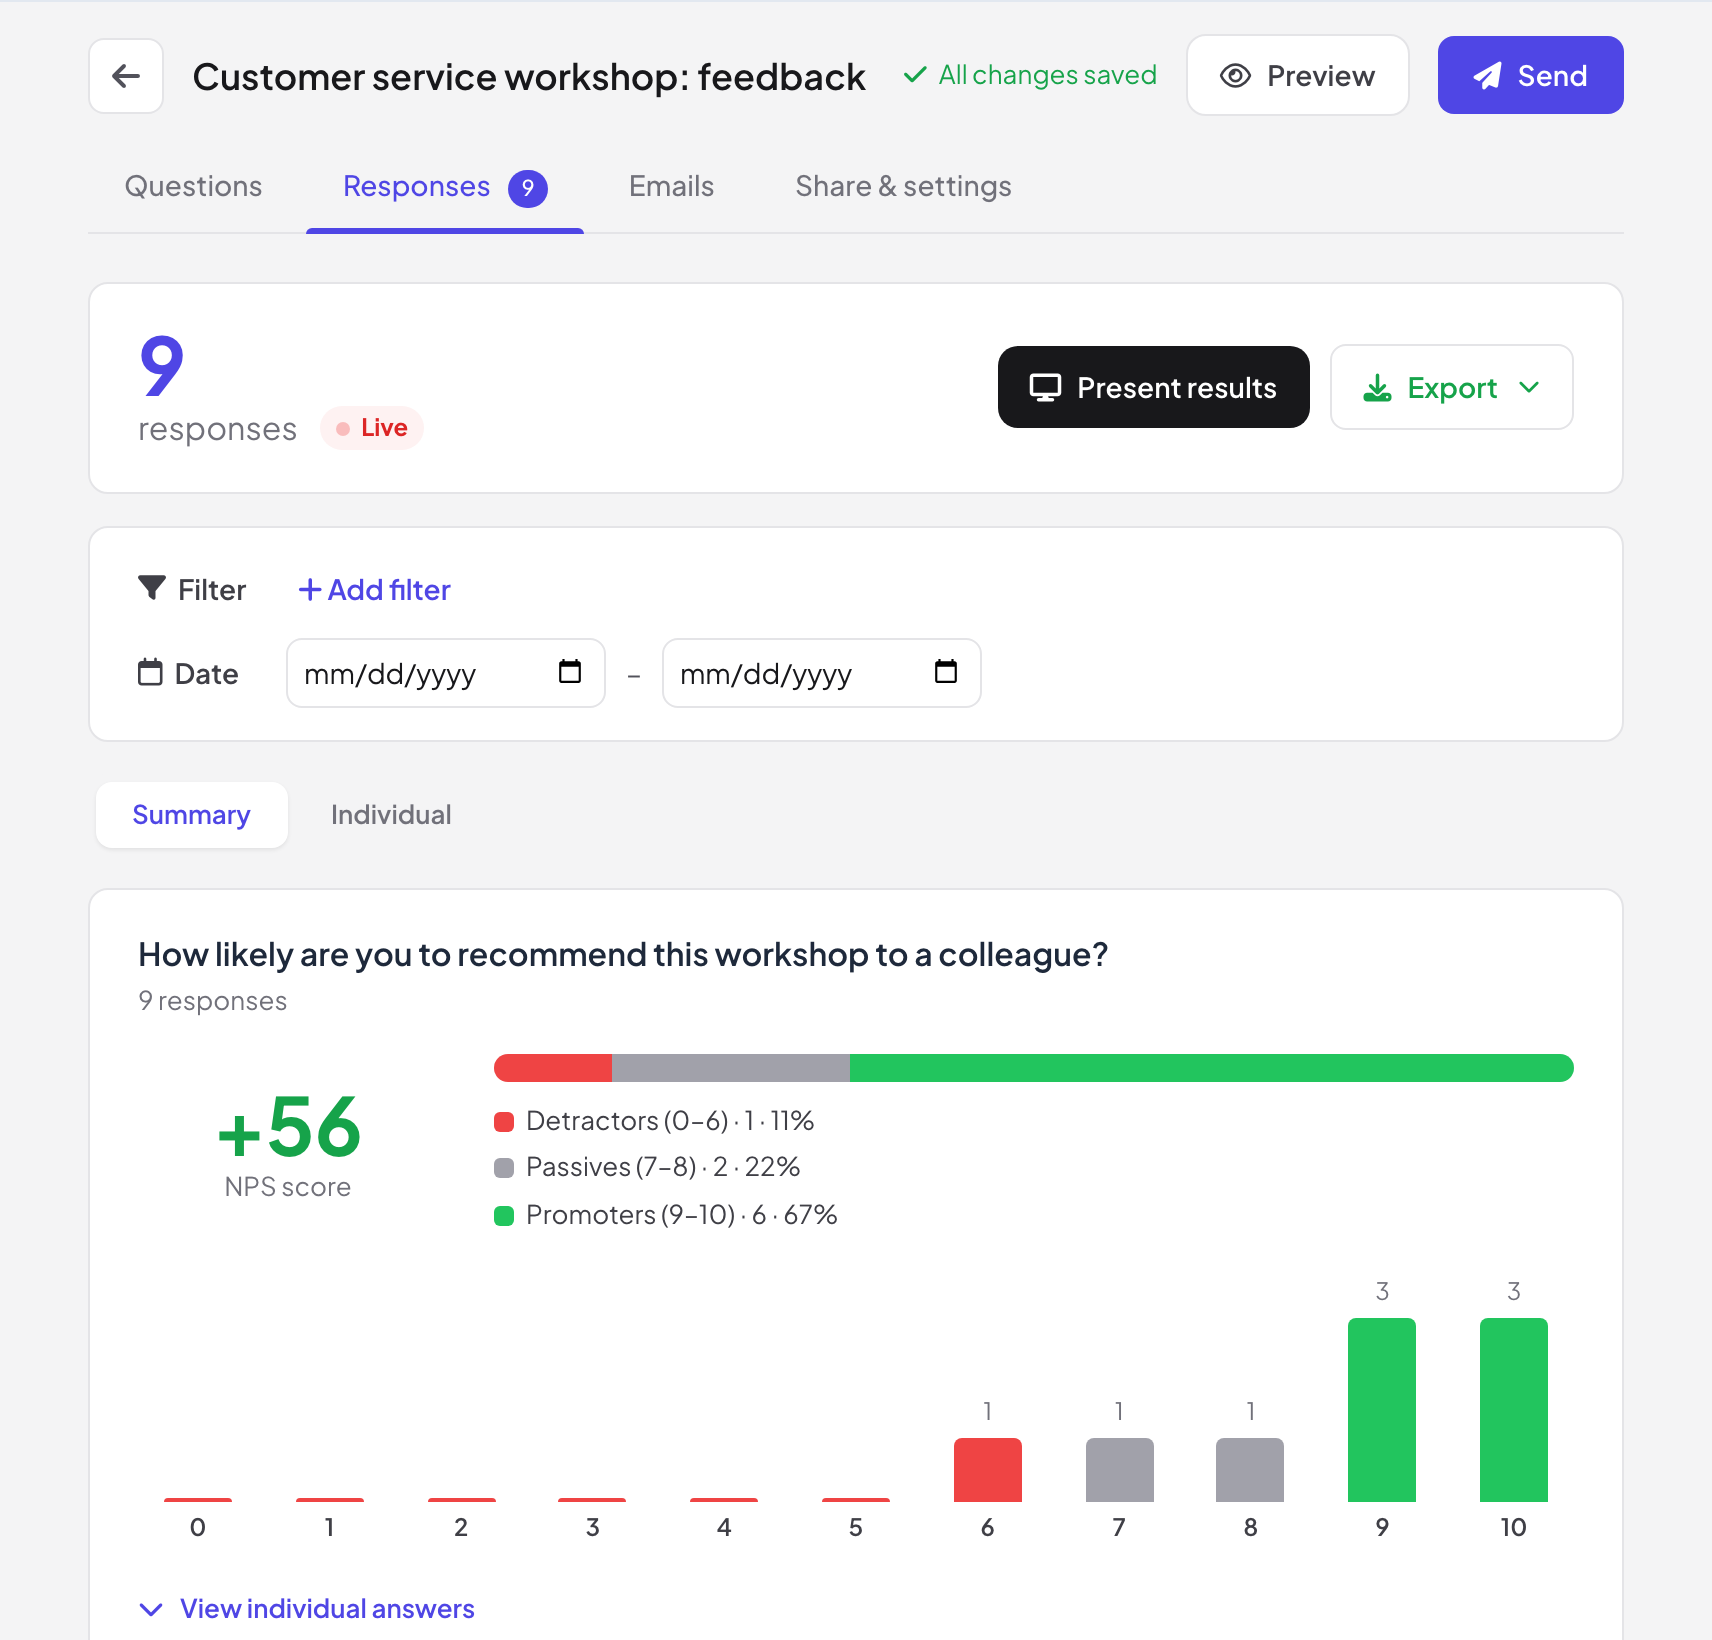
The Responses tab shows the number of responses (with Live while new ones arrive automatically), a Summary chart for each question and the Individual answers. NPS questions show the score and the share of detractors, passives and promoters.
- 2
Filter
Use Add filter or the dates to look at one group only, for example everyone who picked a certain option. Clear filters shows everyone again.
- 3
Present or export
Click Present results to show the results on the big screen, or Export to download them. If a filter is active, the export contains only the filtered responses.
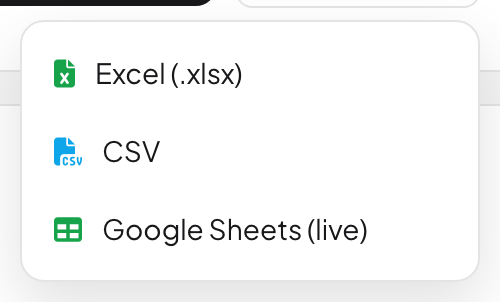
Google Sheets (live) creates a private link to your responses and a formula to paste into cell A1 of a new Google Sheet; the sheet then refreshes by itself, roughly every hour. Anyone with that link can read all responses: Reset link revokes it and Turn off stops it.
Frequently asked questions
Do people need an account to answer a survey?
No. They open the link or scan the QR code and answer. If you turn on Collect email addresses, they type their email before submitting, and the emails are listed on the Emails tab with Download emails CSV.
Is the NPS score calculated for me?
Yes. NPS is the percentage of promoters (9–10) minus the percentage of detractors (0–6), calculated automatically in Responses.
How do I close a survey?
Untick Accepting responses on Share & settings. People who open the link are told the survey is closed. Tick it again to reopen.
Can I reuse a survey?
Yes. In the survey list, use Make a copy to start a new survey from an existing one.
Last checked against the app on 17 November 2026.
Related articles
- Set a self-paced assignmentCreate a homework-style assignment with auto-marked questions, a due date, attempts and a time limit, share it with a link and review the scores.
- Export results to PDF or ExcelDownload the report of a presentation as an Excel file or a PDF on Basic, Pro and Enterprise, and export survey and assignment results on any plan.
- Collect participant informationAsk participants for their name and any other details you need, such as a team or a department, before they can take part in your presentation.