An assignment is a self-paced test or piece of homework. People open a link, answer in their own time and submit. Most question types are marked automatically; essays and file uploads are marked by you. An assignment can stand alone or be linked to a presentation.
Create an assignment
- 1
Open Assignment
Click Assignment in the menu on the left, then Create assignment. Pick a presentation under Linked presentation (optional) or keep None (standalone). Inside a presentation, click the Assignment icon in the top bar.
- 2
Or start with AI
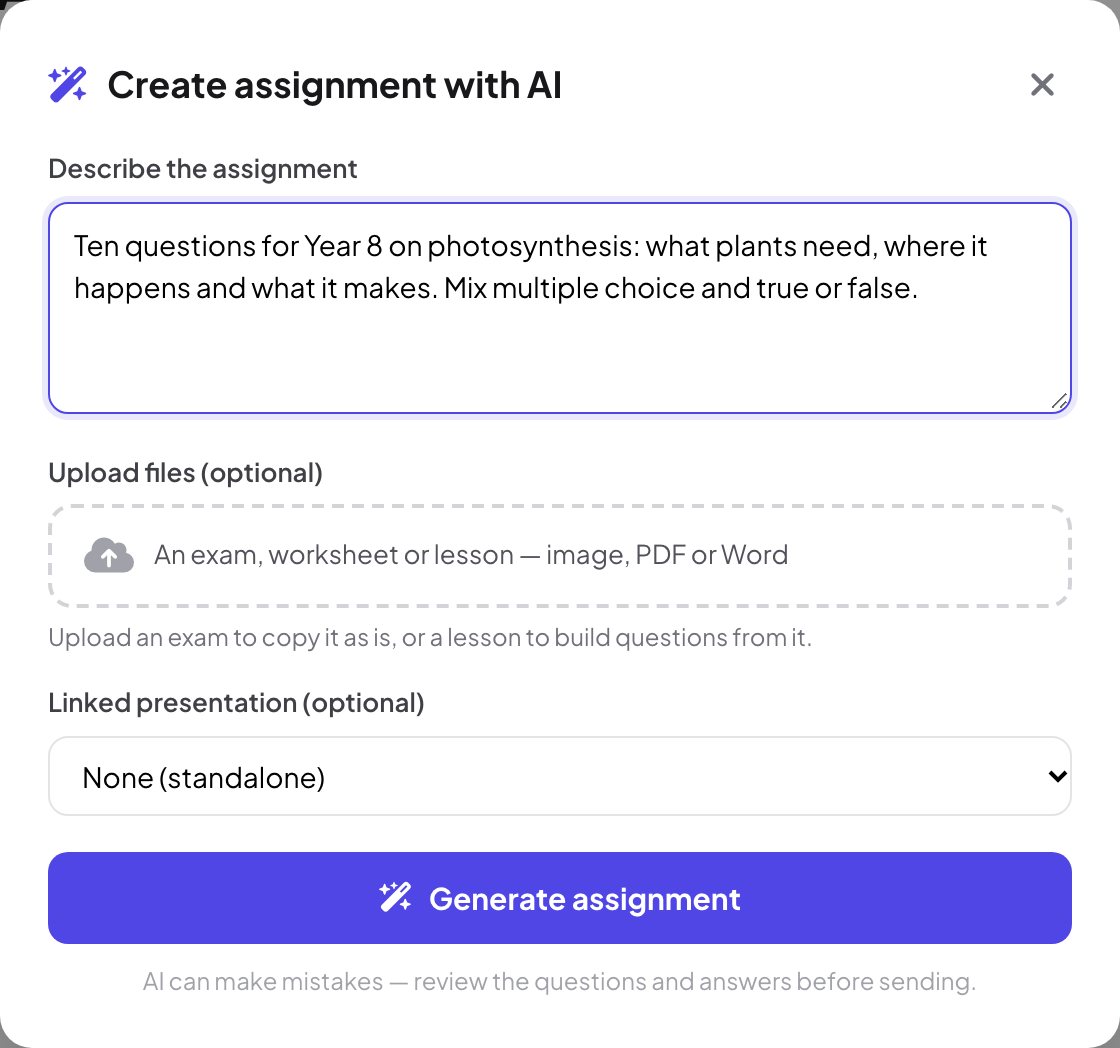
Click Create with AI. In Create assignment with AI, describe the assignment and, if you like, upload an exam, worksheet or lesson (image, PDF or Word), then click Generate assignment. Upload an exam to copy it as it is, or a lesson to build questions from it. AI can make mistakes: review the questions and answers before sending.
- 3
Add questions
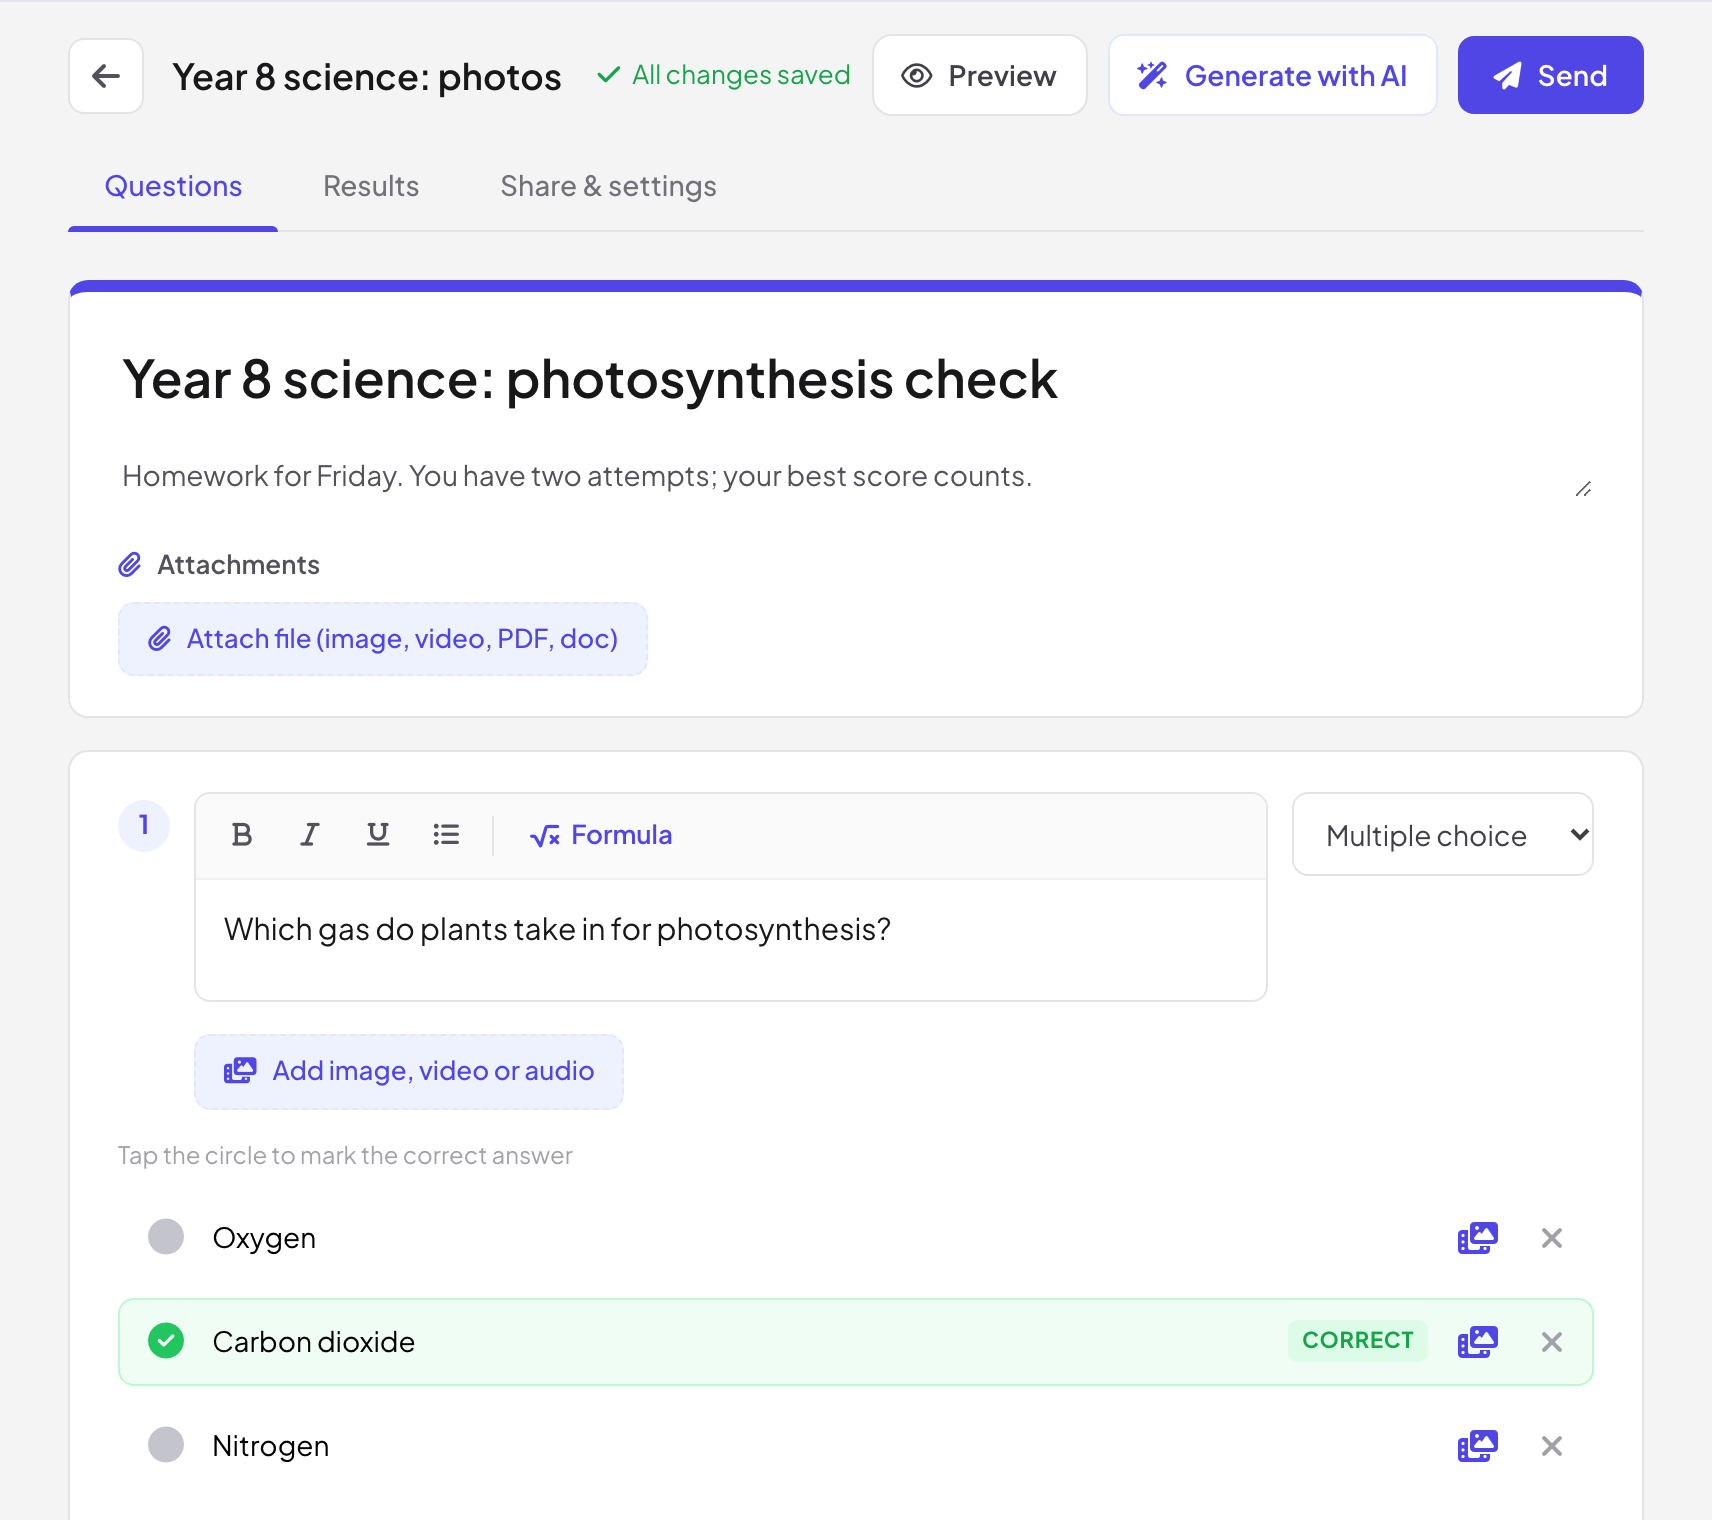
On the Questions tab, click Add question and pick the type at the top right of the question. Tap the circle to mark the correct answer, set the Points, and add an Explanation / worked solution that students see when answers are shown. Generate with AI in the top bar adds questions to an existing assignment.
- 4
Send it
Click Send for the participant link and QR code. If the assignment is linked to a presentation you are presenting, Push to live participants now opens it on the devices of everyone in the live session.
Question types
| Type | How it is marked |
|---|---|
| Multiple choice, Checkboxes, True / False | Automatically |
| Short answer | Automatically, against your accepted answers |
| Numeric | Automatically, with an optional Tolerance (±) |
| Math expression | Automatically |
| Fill in the blank | Automatically: put each answer in [square brackets], and separate several accepted answers with a vertical bar |
| Matching, Ordering | Automatically |
| Essay | By you, with an optional Rubric (optional) |
| File upload | By you |
Assignment settings
Open Share & settings. The Share assignment card has Accepting responses, the participant link and the QR code (and, for a linked assignment, Show on last slide of your presentation). Under Assignment settings:
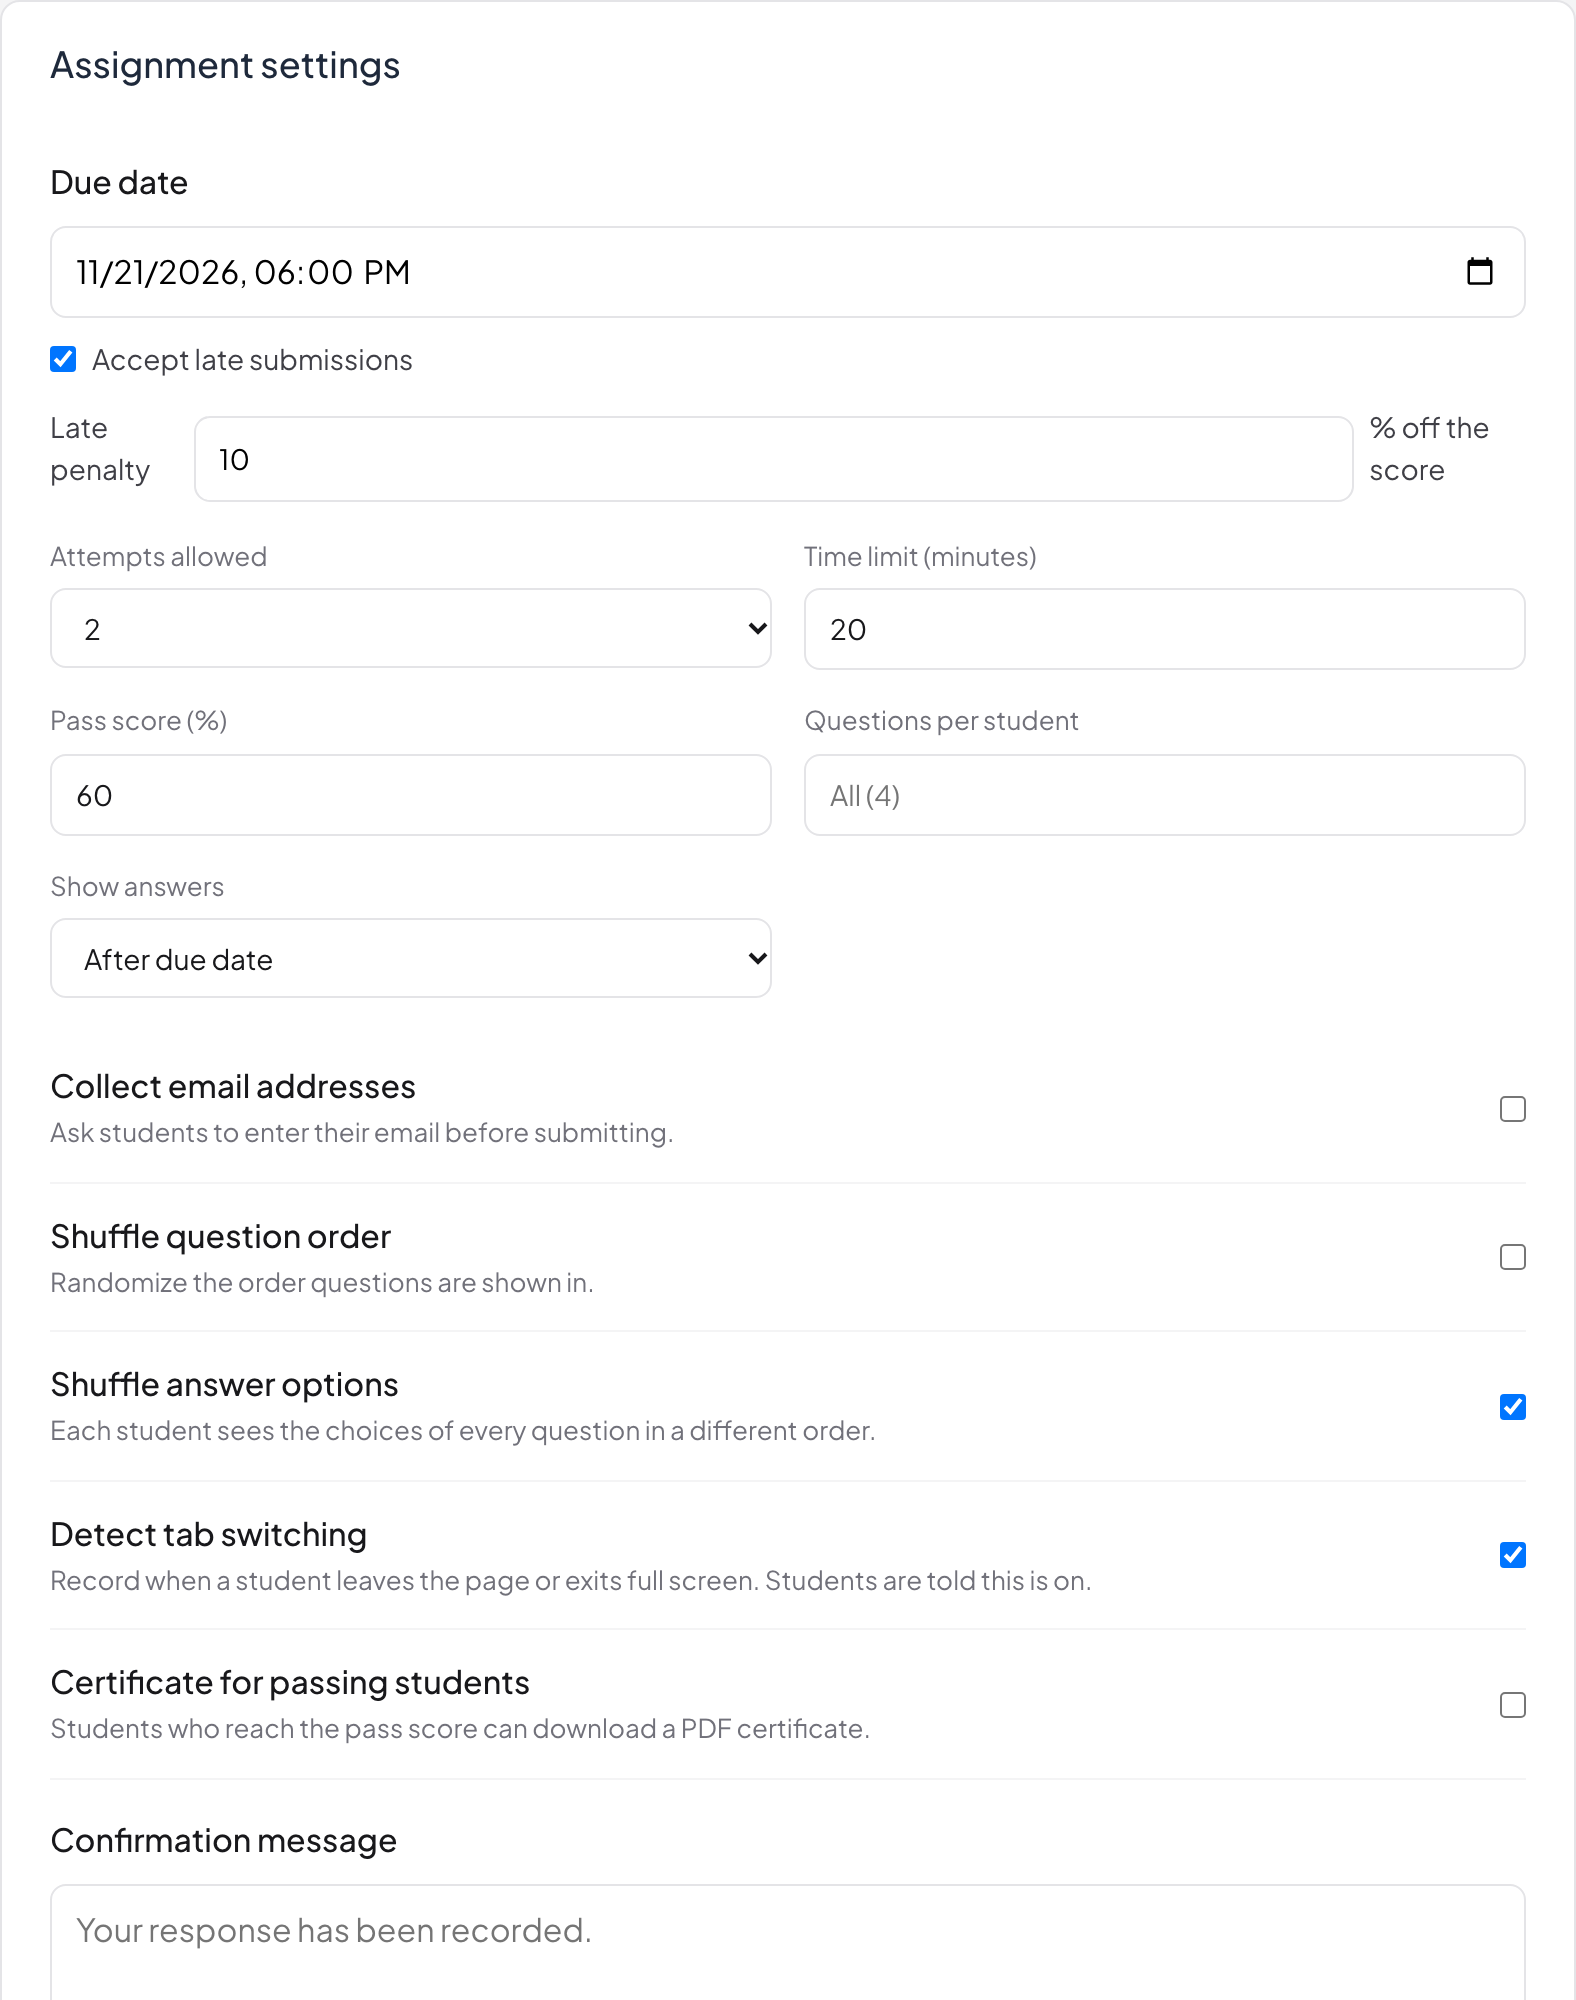
- Due date, with Accept late submissions and a Late penalty as a percentage off the score.
- Attempts allowed: 1, 2, 3 or 5.
- Time limit (minutes): leave empty for no limit.
- Pass score (%) and Certificate for passing students: students who reach the pass score can download a PDF certificate with your Certificate title and Issued by line.
- Questions per student: give each student a random subset of the questions.
- Show answers: After submitting, After due date or Never.
- Shuffle question order and Shuffle answer options.
- Detect tab switching: records when a student leaves the page or exits full screen. Students are told this is on.
- Collect email addresses and a Confirmation message.
What students see
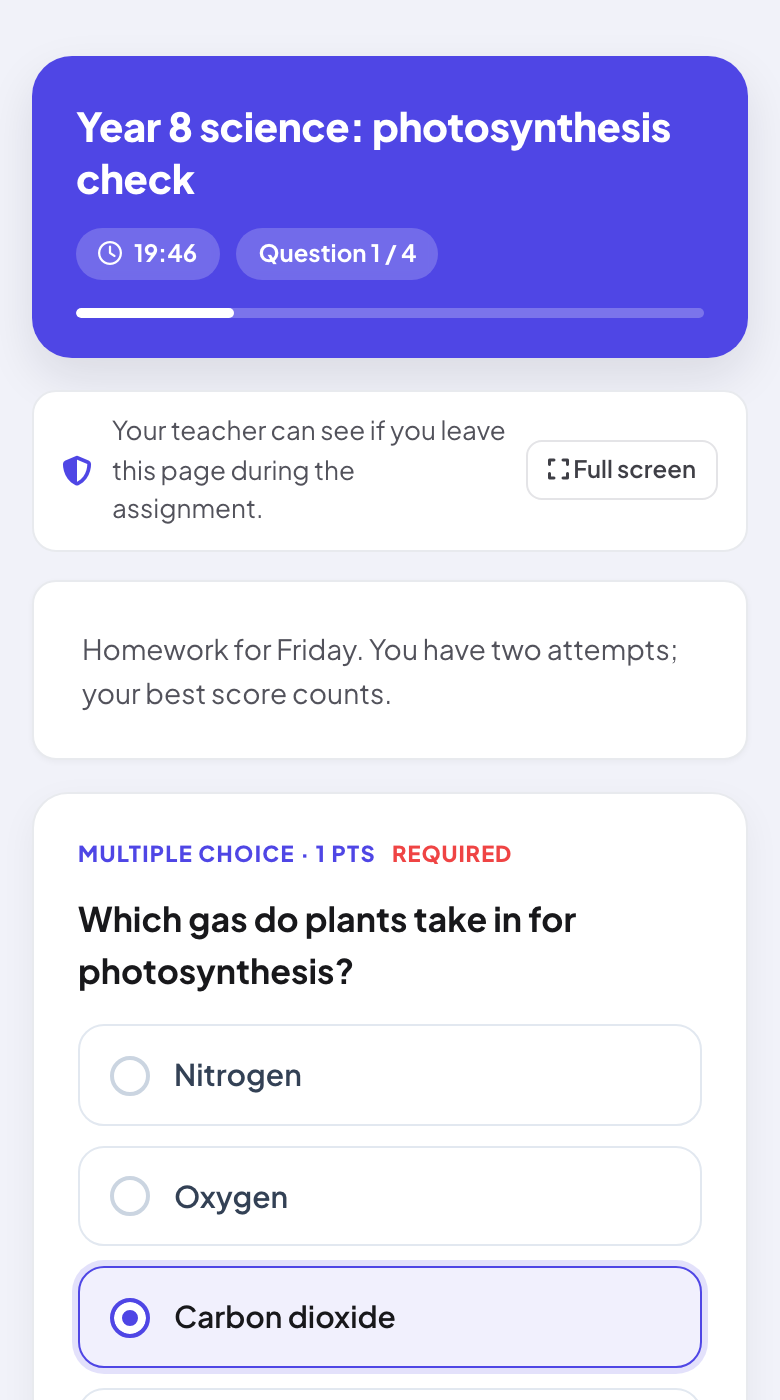
The assignment shows the title, the time left if there is a time limit, the question number and, when tab detection is on, Your teacher can see if you leave this page during the assignment with a Full screen button.
Results and marking
- 1
Open Results
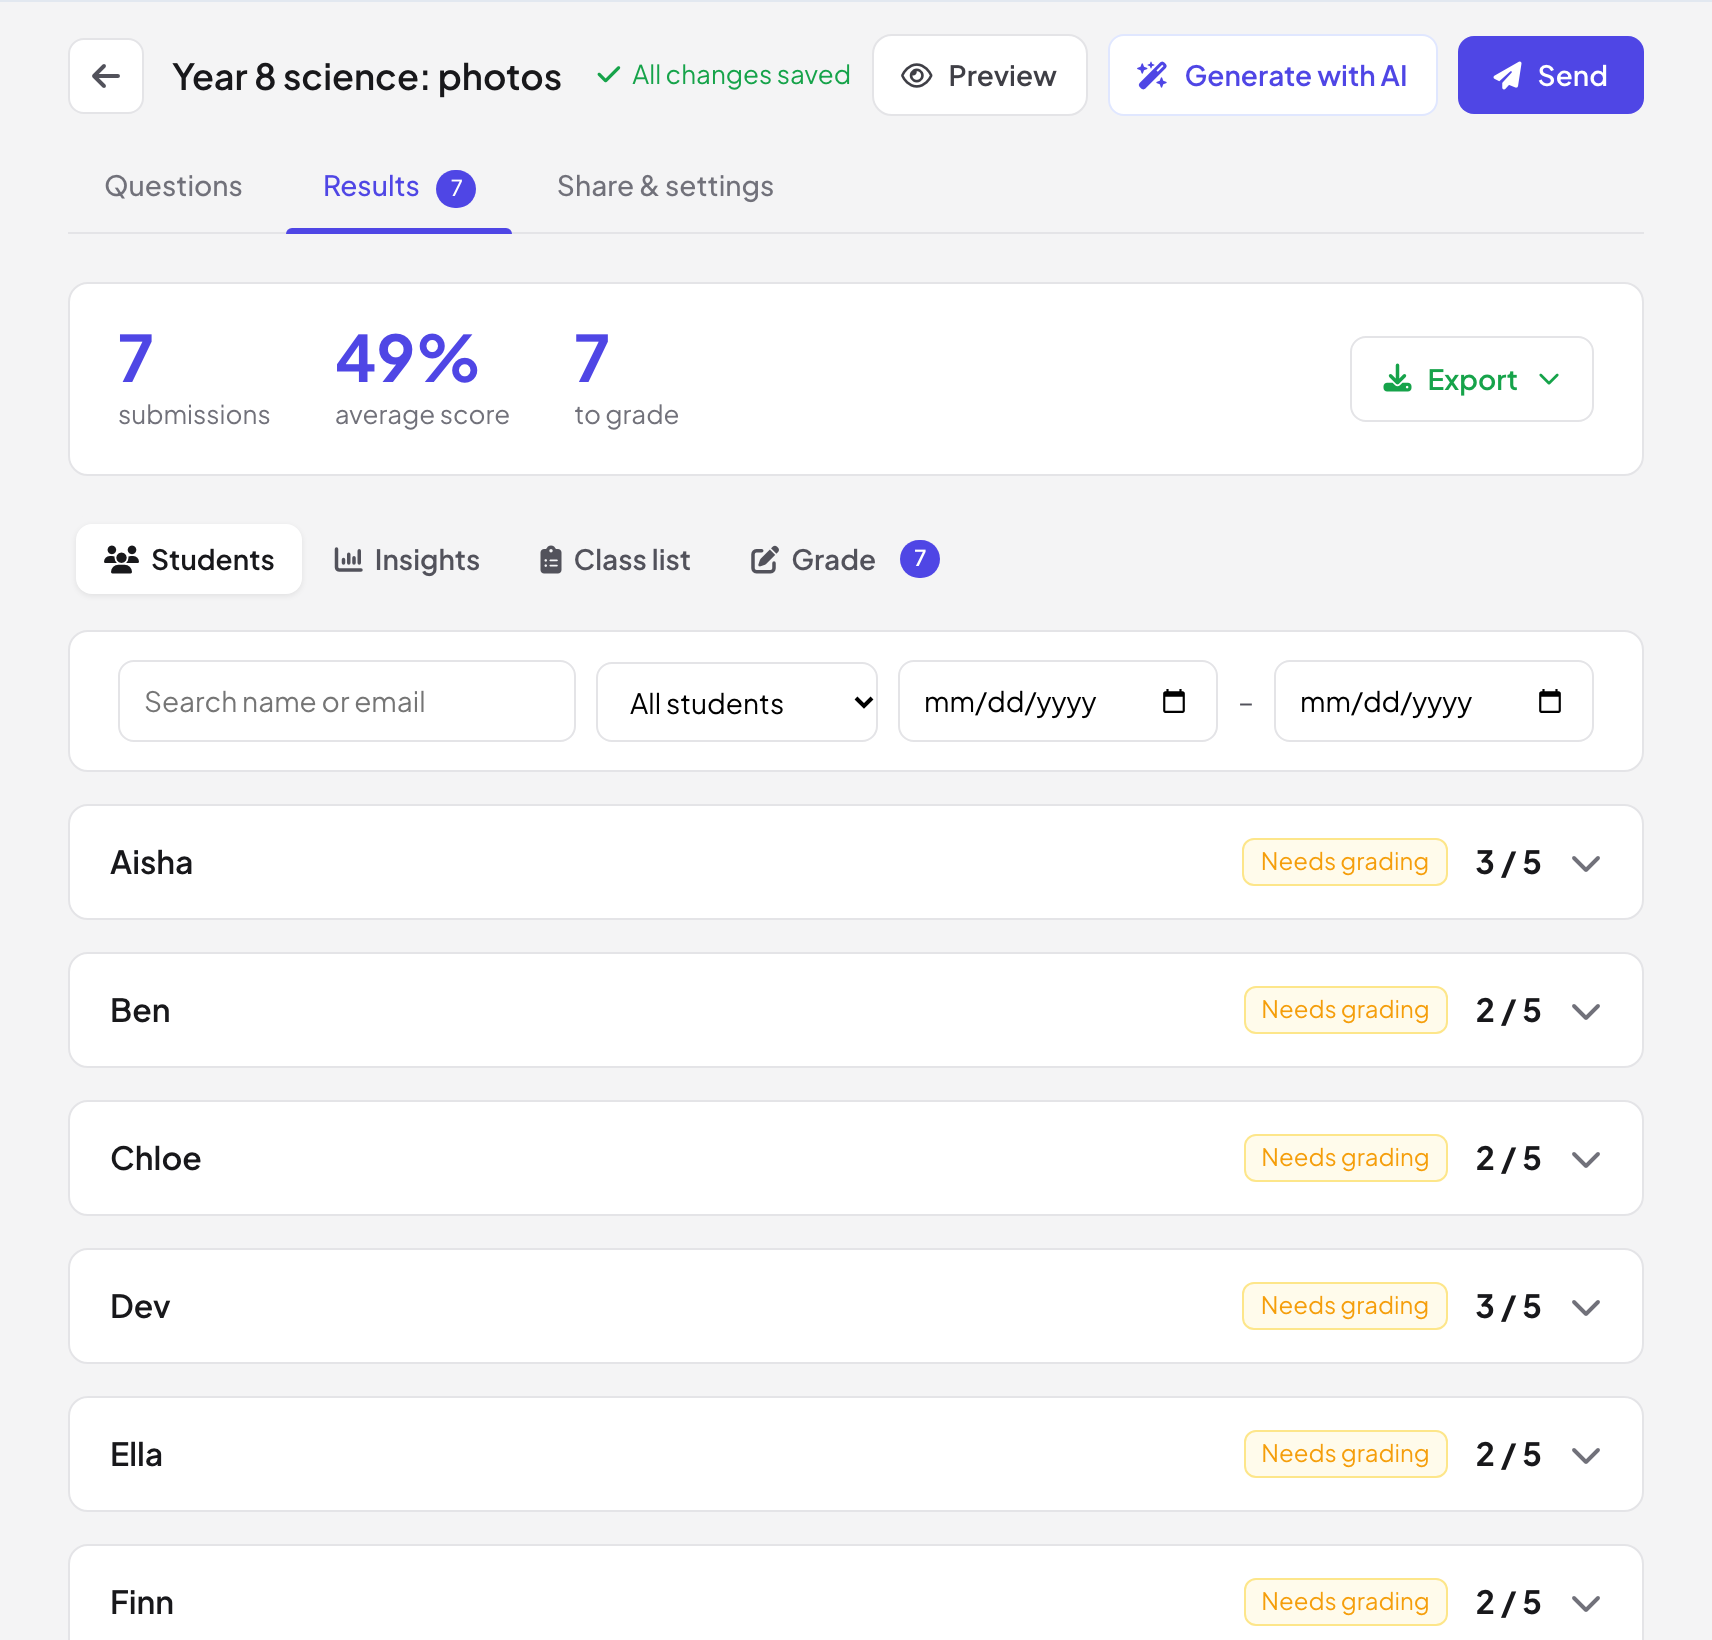
The Results tab shows the number of submissions, the average score and how many answers are left to grade, with Export for Excel (.xlsx) or CSV.
- 2
Students
Every submission with its score. Filter by Passed, Not passed, Needs grading, Late or Left the page, or search by name or email.
- 3
Insights
The score distribution and each question’s results, hardest first, with the most common wrong answer.
- 4
Class list
Paste or upload your list of students (name, email) to see who has not submitted yet.
- 5
Grade
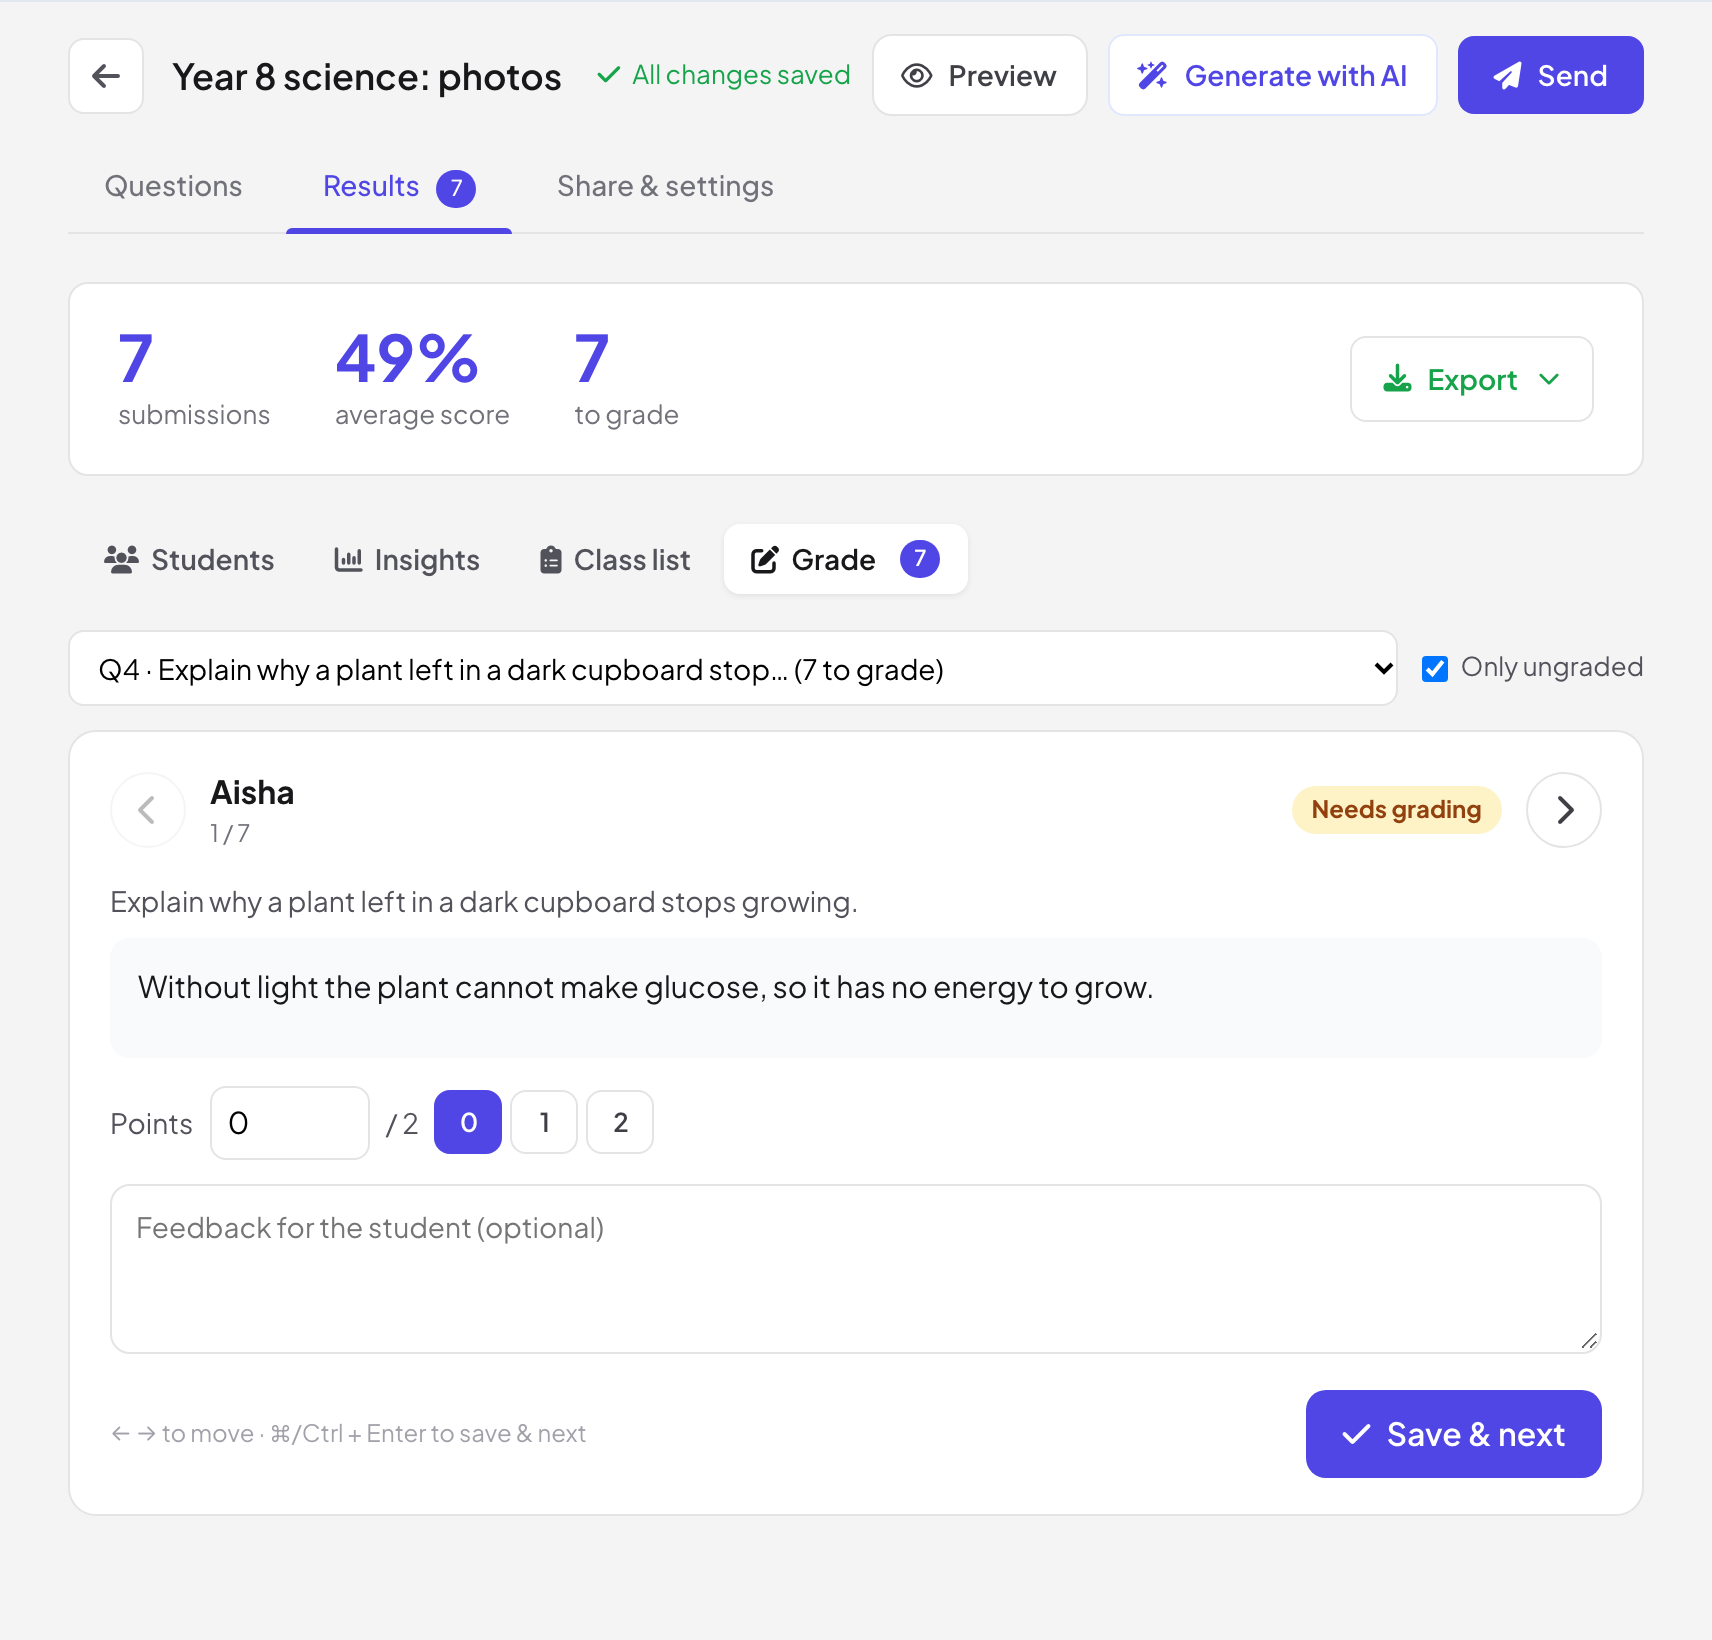
Pick a question (tick Only ungraded to skip marked answers) and walk through the answers: give Points, use the rubric criteria if you set them, add Feedback for the student (optional) and click Save & next.
Frequently asked questions
Do students need an account?
No. They open the link and answer. If you turn on Collect email addresses, they enter their email before they start.
What happens when the time limit runs out?
The attempt can no longer be submitted once the time is up, and the student is told so.
Can students see their mistakes?
Yes, if Show answers is set to After submitting or After due date. They then see the correct answers and your explanations.
Why does every student show Needs grading?
The assignment has an essay or file upload question. Scores are final once you mark those answers in Grade.
Last checked against the app on 17 November 2026.
Related articles
- Create a survey and collect responsesBuild a self-paced survey with text, choice, rating, NPS and file upload questions, share it with a link or QR code and read the responses live.
- Create a presentation with AIDescribe what you need in one sentence and AI builds the slides for you, then refine them with the AI Assistant inside the editor. Free while in beta.
- Export results to PDF or ExcelDownload the report of a presentation as an Excel file or a PDF on Basic, Pro and Enterprise, and export survey and assignment results on any plan.